DJI Neo Combo: Unpacking the Latest Features and Flight Modes
So, you’ve got your hands on the DJI Neo Combo and you’re ready to take to the skies. It’s a pretty neat little drone, and getting it set up is easier than you might think. We’ll walk through everything from what’s in the box to getting that first flight going smoothly. Let’s get this thing ready to fly!
Key Takeaways
- When you unbox your DJI Neo Combo, take a moment to check all the components, especially if you have the Fly More version which includes extra batteries and a charging hub.
- Before you fly, make sure you download the DJI Fly app, activate your drone, and check for any firmware updates. This keeps everything running right.
- Get familiar with the DJI RC-N3 controller. Setting it up, connecting your phone, and keeping its battery charged are important steps for controlling your drone.
- Keep your DJI Neo Combo powered up by correctly installing and charging the Intelligent Flight Batteries. The charging hub is handy for this.
- Explore the different flight modes, like hand launching and gesture controls, but always be aware of the drone’s flight height limits, which can’t be changed.
Unboxing Your Dji Neo Combo
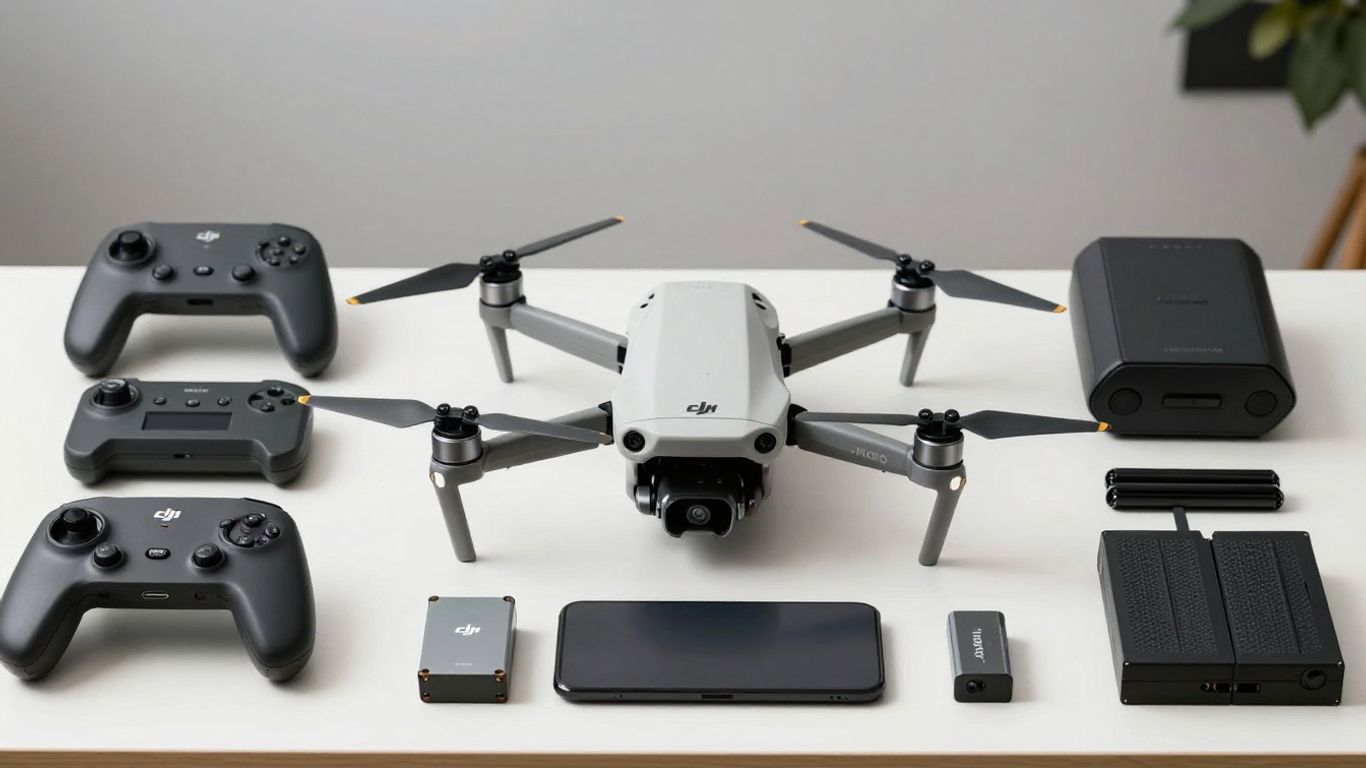
Alright, let’s get this party started! You’ve got your shiny new DJI Neo Combo, and the first step is, of course, opening that box. It’s always a bit of a thrill, isn’t it? Inside, you’ll find the drone itself, and depending on which combo you snagged, a few extra goodies like extra batteries, a charging hub, and the DJI RC-N3 controller. Take a moment to just look everything over. Make sure nothing looks out of place or damaged during shipping. You’ll want to carefully remove the little plastic protector from the camera gimbal – that’s important for keeping your lens safe before you even take off.
Initial Inspection Of The Dji Neo
First things first, give the drone a good once-over. Check for any scuffs, dents, or anything that just doesn’t look right. It’s pretty straightforward, but it’s a good habit to get into. You’ll notice the drone is quite compact, which is a big plus for portability. It’s designed to be easy to handle, especially if you’re planning on using the hand launch feature, which is pretty neat. This initial check ensures you’re starting with a pristine piece of equipment.
Identifying Key Drone Components
Let’s point out a few things on the drone itself. You’ll find the power button, usually located towards the rear. Up near the front, you’ll see the camera and gimbal assembly. There are also indicator lights that will tell you the battery status and what flight mode the drone is in. It’s good to familiarize yourself with these so you know what your drone is telling you mid-flight. Knowing where the battery level indicators are is particularly helpful for planning your flights.
Preparing The Dji Neo For First Flight
Before you can actually get this thing in the air, there are a couple of prep steps. You’ll need to install the battery – it usually just slides in until it clicks. Make sure it’s seated properly. You’ll also want to remove the gimbal protector if you haven’t already. This is also the time to check if any firmware updates are needed, which is something we’ll cover in more detail soon. Getting these small things done now means a smoother experience when you’re ready for that very first flight. You can find more details on getting your drone ready on the DJI Fly app page.
Remember to always check your local regulations before flying your drone. Different areas have different rules about where and how you can fly.
Essential Dji Neo Combo Preparations
Before you can take your DJI Neo Combo for its first spin, there are a few key steps to get everything set up and ready. Think of it like prepping your gear before a big hike – you wouldn’t just head out without checking your boots and packing water, right? The same applies here. Getting these basics sorted means your flight will be smoother and way more enjoyable.
Downloading And Installing The Dji Fly App
First things first, you’ll need the DJI Fly app. This is your main control center for the drone. You can grab it from your smartphone’s app store. Just search for "DJI Fly" and install it. It’s pretty straightforward, but make sure your phone has a stable internet connection during the download. This app is where you’ll see the live camera feed, control flight settings, and manage your drone’s data. It’s also how you’ll activate the drone and update its software, so it’s a pretty big deal.
Activating Your Dji Neo Drone
Once the app is installed and you’ve powered on your drone and controller, it’s time for activation. You’ll need to connect your smartphone to the controller, and then the app will guide you through the process. This usually involves logging into your DJI account. Activation links your drone to your account and verifies it’s ready for flight. It’s a quick step, but don’t skip it. If you purchased DJI Care Refresh, you’ll also want to bind that within 48 hours of activation.
Firmware Updates For Optimal Performance
Just like your smartphone, your drone and its controller get software updates. These aren’t just random changes; they often include performance improvements, bug fixes, and sometimes even new features. When you launch the DJI Fly app and connect to your drone, it will usually tell you if an update is available. It’s really important to install these updates. Just tap the prompt in the app and let it do its thing. Make sure neither the drone nor the controller powers off during the update, and don’t close the app. It might take a few minutes, and the drone might restart itself, which is normal. Keeping your firmware up-to-date is key for a safe and reliable flight experience, and it helps ensure you’re getting the most out of your drone’s capabilities. You can find more information on optimizing your drone’s settings before its maiden voyage here.
Mastering The Dji Rc-N3 Controller
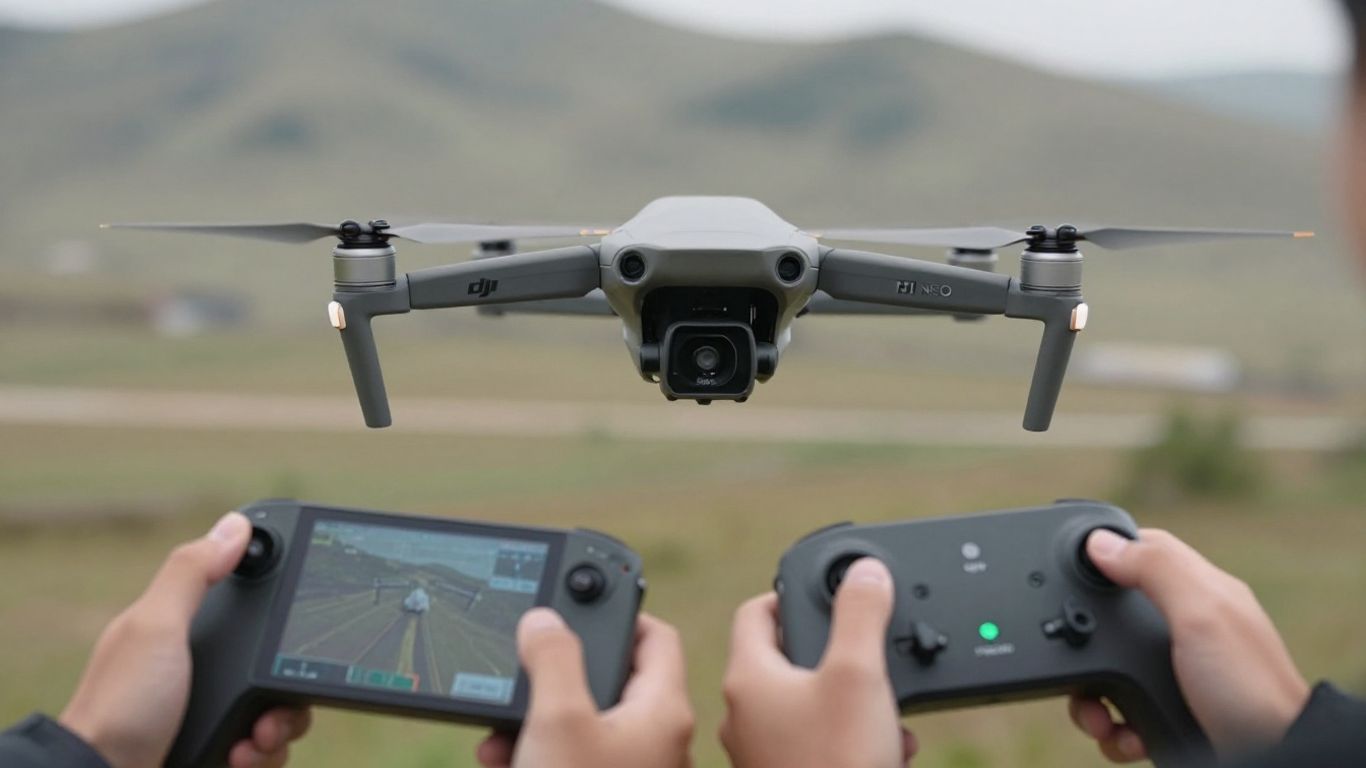
Alright, let’s get you acquainted with the DJI RC-N3 controller. This is your main link to the drone, so getting comfortable with it is pretty important. Think of it as the steering wheel and dashboard for your Neo.
Setting Up The Dji Rc-N3 Controller
First things first, you’ll need to get the controller ready. It comes with the control sticks tucked away for easy transport. Just unscrew them from their storage spots on the bottom and screw them into the top. It’s a simple twist-on process. Make sure they’re snug. You’ll also want to check the battery level by giving the power button a quick press. If it needs juice, plug it in using the USB-C port. While it’s charging, you can set up the smartphone holder. Pull out the mount, connect your phone using the appropriate cable (make sure the RC icon connector is seated properly), and then secure your phone. It’s designed to hold your phone steady so you can see what the drone sees.
Connecting Your Smartphone To The Controller
Once the controller and your phone are set up, it’s time to link them. Power on the controller by pressing the power button once, then pressing and holding it for a couple of seconds. Your smartphone should already have the DJI Fly app installed from the previous steps. Open the app. It should automatically detect the controller, or you might need to go through a quick connection guide within the app to pair them up. The app will show you the drone’s camera feed and all the flight information. Having your smartphone connected is key for viewing the live camera feed and accessing advanced settings.
Controller Firmware And Battery Management
Just like the drone, the RC-N3 controller needs its firmware updated now and then. The DJI Fly app will usually let you know when an update is available. It’s a good idea to install these updates to make sure everything is running smoothly and to get any new features or fixes. Keep an eye on the controller’s battery level, especially before longer flights. You can charge it via USB-C. For extended flying sessions, consider having a power bank handy or ensuring you have a fully charged spare battery for your phone if it’s powering the connection.
Here’s a quick rundown of controller basics:
- Powering On/Off: Press once, then press and hold for two seconds.
- Control Sticks: Twist to install on top.
- Charging: Use the USB-C port.
- Firmware: Update via the DJI Fly app when prompted.
Remember to always check your controller’s battery level before you head out for a flight. Running out of power mid-air isn’t ideal, and the controller dying means you lose control of your drone. It’s a good habit to get into.
If you’re curious about different ways to control your drone, you might find information on alternative control methods useful, like those for the DJI Avata.
Powering Your Dji Neo Combo Flights
Getting your DJI Neo Combo ready for flight means making sure you’ve got the power sorted. It’s not just about having batteries; it’s about how you manage them.
Battery Installation and Activation
First things first, you need to get those Intelligent Flight Batteries into the drone. It’s pretty straightforward. You’ll usually hear a little click when it’s seated correctly. Before you even think about flying, you’ll need to activate the battery. This is often done by connecting the drone to a power source, like a charger, and pressing the power button. The LEDs on the battery will light up, showing it’s ready to go. It’s a good idea to check the battery level indicators on the drone itself after installation to see how much juice you have to start with.
Charging Methods for Intelligent Flight Batteries
When it comes to charging, you’ve got a couple of options, and it’s always best to have them topped up before you head out. You can charge the battery directly while it’s installed in the drone using a USB-C cable and a compatible charger. This is handy if you only have one battery and need to get it ready. However, if you have the Fly More Combo, you’ll likely have a battery charging hub.
This hub is a real game-changer. You can slot multiple batteries into it, and it charges them sequentially, usually starting with the one that has the highest charge remaining. This means you can get all your batteries ready to go without having to swap them in and out of the drone constantly. It’s a much more efficient way to manage your power.
- Direct Charging: Connect the drone with the battery installed to a USB-C charger.
- Charging Hub: Use the dedicated hub to charge multiple batteries at once.
- Power Bank Function: Some hubs can even act as a power bank to charge your phone or other devices.
Utilizing the Battery Charging Hub
The charging hub isn’t just for charging, though. It’s a pretty smart piece of kit. As mentioned, it charges batteries in order, which is great. But it can also be used as a power bank. If you find yourself needing to charge your phone or another small USB device while you’re out in the field, you can use the hub and a battery to give it a little boost. Just make sure you’ve got enough power left in the battery for your drone flights first!
Always make sure your batteries are fully charged before attempting any extended flight sessions. A dead battery mid-flight is never a good situation and can lead to losing your drone. Check the DJI Mini 3 Pro battery specs for an idea of flight times, as the Neo will have similar considerations [ca88].
Remember, keeping your batteries in good condition by charging and storing them properly will help them last longer and perform better on every flight.
Exploring Dji Neo Combo Flight Modes
Hand Launch and Landing Techniques
Getting your DJI Neo airborne for the first time might seem a bit daunting, but DJI has made it pretty straightforward. You’ve got a couple of ways to get it up and flying. The most common method is the standard takeoff from a flat surface, but the Neo also offers a hand launch option. To do this, hold the drone securely with one hand, ensuring your fingers aren’t near the propellers. Then, use the other hand to activate the motors via the DJI Fly app or controller. Once the motors are spinning, gently toss the drone upwards. It’s designed to stabilize itself quickly after the toss. Landing is just as simple. You can bring it down for a controlled landing on a flat surface, or if you’re feeling adventurous, you can perform a hand catch. To do this, hover the drone a few feet above your hand and carefully guide it down, gripping the landing gear. Always be mindful of the propellers during these maneuvers.
Gesture Controls and Selfie Capabilities
One of the really neat things about the DJI Neo is its gesture control feature. This lets you command the drone without even touching the controller. Point at the drone and raise your arm, and it should recognize the gesture. You can then use hand movements to tell it to fly forward, backward, left, or right. It’s particularly handy for taking selfies. Simply activate gesture mode, position yourself, and use a specific hand signal (like forming a frame with your fingers) to initiate a photo or video recording. It feels pretty futuristic, and it’s a fun way to capture yourself with the drone in the background without needing a second person.
Understanding Flight Height Limitations
It’s important to know that the DJI Neo has some built-in limits on how high it can fly. These aren’t just suggestions; they’re hard limits set by DJI to keep things safe and legal. When you’re using the drone with the RC-N3 controller, the maximum flight height is capped at 120 meters (about 394 feet). However, if you’re flying using just your smartphone via the DJI Fly app or using the hand launch method, this limit is significantly reduced to just 30 meters (about 98 feet). These restrictions can’t be bypassed in the app, so you’ll need to plan your shots accordingly. It’s a good reminder that this drone is best suited for closer-range aerial photography and videography, rather than sweeping, high-altitude landscapes.
Dji Neo Combo: Features And Considerations
Video Quality And Recording Capabilities
The DJI Neo Combo shoots video in 4K, and honestly, the footage comes out surprisingly clear and smooth. For a drone in this price bracket, you get some really good quality. It’s definitely good enough for sharing online or just keeping as memories. You can quickly get your videos off the drone using QuickTransfer or a USB cable, which is handy when you’re eager to see what you’ve captured.
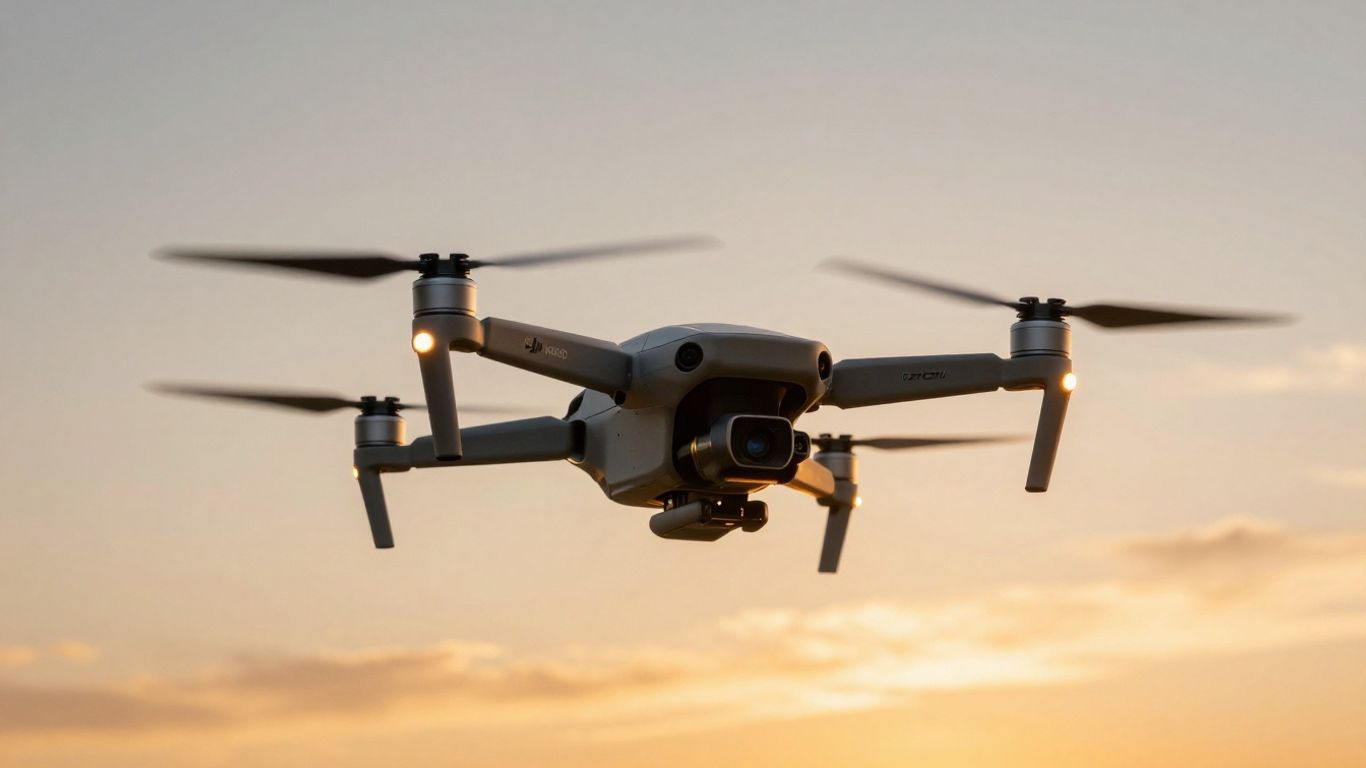
Portability And Compact Design
This drone is incredibly lightweight, weighing in at just 135 grams. It’s small enough to tuck into a larger jacket pocket or a purse, making it a fantastic travel companion. Even with the battery installed, it doesn’t feel heavy, which is a big plus if you plan on carrying it around for extended periods. The whole setup, especially if you get the Fly More Combo, is designed to be easy to pack and take with you anywhere.
Environmental Factors And Flight Restrictions
Now, you need to be aware of a couple of limitations. The Neo isn’t a fan of windy conditions, so you’ll want to stick to calm days or indoor flying if there’s even a slight breeze. Also, there are height limits. When using the controller, the maximum flight height is 120 meters (about 394 feet). However, if you’re just using hand launch or the mobile app, that limit drops to 30 meters (about 98 feet). These limits are in place for safety and can’t be changed in the app. It’s also worth noting that the battery life is around 19 minutes, though closer to 17 minutes with the propeller guards on, so you might want to look into the DJI Mini drone bundle if you plan on longer flights.
Keep in mind that while the DJI Neo is packed with features for fun and easy flying, it also has specific limitations regarding wind and altitude. Always check the weather and be aware of your surroundings before you take off.
Here’s a quick look at some key specs:
| Feature | Specification |
|---|---|
| Max Flight Time | Approx. 19 minutes |
| Max Flight Height (Controller) | 120 meters (394 feet) |
| Max Flight Height (App/Hand) | 30 meters (98 feet) |
| Weight | 135 grams |
| Video Resolution | 4K |
| Built-in Storage | 49 GB (No microSD card support) |
Thinking about the Dji Neo Combo? It’s packed with cool features that can make your projects easier. From its amazing camera to its smart flight modes, this combo has a lot to offer. If you want to know all the details and see if it’s the right fit for you, check out our full review on our website!
Ready to Fly?
So, you’ve unboxed your DJI Neo and maybe even grabbed the Fly More Combo. You’ve got the app ready, the firmware updated, and you’re familiar with the controller. It’s a pretty neat little drone, right? It’s definitely a good option if you’re just getting into drones or need something super portable for trips. Just remember those wind limitations and the flight height – it’s not for massive landscape shots, but for capturing your adventures up close, it does a solid job. Now go out there and start flying!
Frequently Asked Questions
What comes in the DJI Neo Combo box?
When you open your DJI Neo Combo, you’ll find the drone itself, of course. If you have the Fly More Combo, it also includes extra batteries to keep you flying longer, a charging hub to power up multiple batteries at once, and the DJI RC-N3 remote controller. You’ll also find cables and other small accessories to get you started.
How do I get my DJI Neo ready to fly for the first time?
First, you’ll need to download the DJI Fly app onto your smartphone. Then, you’ll activate your drone by following the instructions in the app, which usually involves powering on the drone and connecting it. Make sure to check for and install any available firmware updates for both the drone and the controller to ensure everything works smoothly and safely.
How do I charge the DJI Neo’s batteries?
You can charge the Intelligent Flight Batteries using the included USB-C charger connected directly to the drone. If you have the Fly More Combo, the charging hub is a super handy way to charge multiple batteries at the same time. Just plug them in, and the hub will take care of the rest. It’s always a good idea to fully charge them before you head out for a flight.
What are some of the cool flight modes or features on the DJI Neo?
The DJI Neo is pretty neat because it has features like hand launch and landing, which makes starting and ending your flight really easy. It also has gesture controls, so you can often use hand movements to make the drone take pictures or follow you, perfect for quick selfies. Just remember there are limits on how high it can fly, especially when using just your phone to control it.
Is the DJI Neo easy to carry around?
Absolutely! The DJI Neo is designed to be super portable. It’s very lightweight, and its small size means you can easily slip it into a jacket pocket or a small bag. This makes it a great drone to take with you on trips or just out and about without feeling weighed down.
What kind of video quality can I expect from the DJI Neo?
You can expect pretty clear and smooth video footage from the DJI Neo, especially considering its affordable price. It’s great for capturing everyday moments or starting out in drone videography. While it might not be for super professional movie-making, the quality is definitely impressive for its size and cost.